


Let’s be real, fellas. You dropped a small fortune on that smartphone. It’s a supercomputer in your pocket, a portal to all human knowledge, and a direct line to your buddies for complaining about the game. But for most of us, the camera is a mystery. We use it to take blurry pictures of our dogs and poorly lit photos of a steak we’re way too proud of. It’s like owning a Corvette and only ever driving it to the grocery store. A total waste of potential.
Well, that ends today. You don’t need to buy some fancy, complicated camera with more lenses than a fly. You’ve already got a pro level camera right there in your hand. You just need to know a few simple tricks to unlock it. Forget the technical gibberish. This is a straight talk guide to making your phone camera work for you, so you can finally get those killer shots of your BBQ, your fishing trip, or your kids actually looking at the camera for once.
The Golden Rule: Clean Your Lens, You Animal
This is so basic, but I’m gonna say it because I’ve seen your phone. It’s covered in fingerprints, pocket lint, and probably a little BBQ sauce. That grimy little lens is the number one reason your photos look hazy and dull. You wouldn’t try to look through a dirty windshield, so stop taking pictures through a dirty lens. Give it a quick wipe on your shirt before you shoot. Seriously, this one free trick will improve your photos more than any filter. You’re welcome.
Stop Using the Zoom. I Mean It.
That little slider or pinch to zoom feature is a lie. It’s not a real zoom like on a big camera. It’s a “digital zoom,” which is a fancy term for cropping the picture before you take it. You’re literally throwing away quality. The result is a grainy, pixelated mess that looks like it was taken on a phone from 2007.
So what do you do if you can’t get closer to your subject? You use your feet. Walk closer. It’s the original zoom, and it works perfectly every time. If you absolutely can’t get closer, just take the photo normally and crop it afterward on your phone. You’ll end up with a much better picture, I promise.
Master the Light, Don’t Fight It
Lighting is everything. Your phone’s tiny sensor is a diva when it comes to light. It loves lots of soft, beautiful light and hates trying to see in the dark.
The Sun is Your Best Friend (When It’s in the Right Place)
Never, ever shoot with the sun directly behind you, blazing into your subject’s face. They’ll be squinting like they just saw a ghost, and the shadows will be harsh and ugly. Also, never shoot directly into the sun unless you’re going for a silhouette effect.
The best light is “golden hour,” that time right after sunrise or right before sunset. The light is warm, soft, and comes in from the side, making everything and everyone look amazing. If it’s the middle of the day, find some open shade, like under a tree or the awning of a building. This gives you even, flattering light without the harsh squints.
Conquer the Dark Without the Flash
That built in flash on your phone is a weapon of mass destruction. It’s harsh, it makes people look like ghosts, and it kills all the mood. Just turn it off. Permanently.
For low light, you need stability. Your hands shake, and in the dark, that shake turns into a blurry photo. Steady your phone against a wall, a table, or the back of a chair. Even better, use the timer function. This lets you press the button without jiggling the phone. Most phones also have a “Night Mode” now. Use it. It works by taking multiple quick pictures and blending them together to reduce blur and grain. It’s pure magic for shooting in a dimly lit bar or around the fire pit.
Composition: Stop Putting Everything in the Center
This is what separates a snapshot from a great photo. It’s just about where you put things in the frame.
The Rule of Thirds (It’s Not Really a Rule)
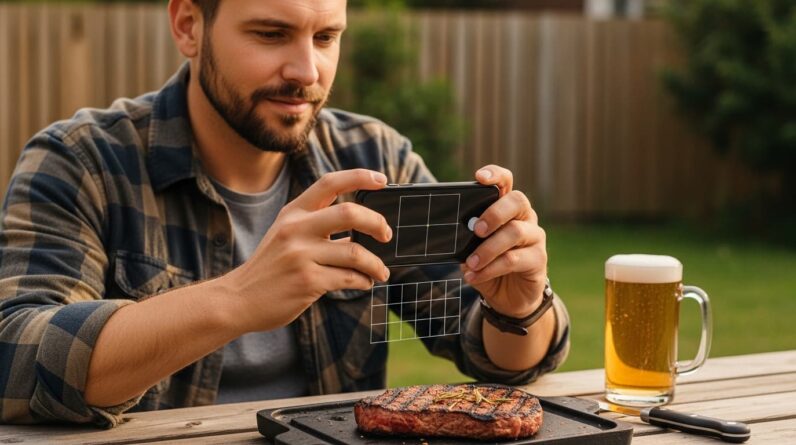
Turn on the “grid” feature in your camera settings. You’ll see two horizontal and two vertical lines dividing your screen into nine squares. Now, instead of plonking your subject dead center, try placing them where these lines intersect. If you’re taking a picture of a buddy, line up his eyes with the top horizontal line. Shooting a landscape? Put the horizon on the top or bottom line, not right in the middle. This simple trick instantly makes your photos more dynamic and interesting.
Find a Frame and Lead the Way
Look for natural frames to put around your subject. It could be a tree branch, a window, or an archway. This draws the viewer’s eye right to what you want them to see.
Also, pay attention to “leading lines.” Use a road, a fence, or a shoreline to lead the viewer’s eye through the photograph and toward your main subject. It gives the picture a sense of depth and direction.
Your Phone’s Secret Weapon: Pro/Manual Mode
This sounds scary, but stick with me. If your phone has a “Pro” or “Manual” mode in the camera app, you need to try it. This is where you truly take control. You’re basically becoming the boss of the camera. There are three main things to play with, but we’ll keep it simple.
ISO: This is how sensitive your camera is to light. A low ISO number (like 100) is for bright days. A high ISO (like 1600) is for dark scenes. The catch? The higher the ISO, the more grain you get. So always use the lowest ISO you can get away with.
Shutter Speed: This is how long the camera’s “eye” stays open. A fast speed (like 1/1000) freezes action, perfect for your kid sliding into home plate. A slow speed (like 1/10) lets in more light but will blur anything that moves, great for capturing light trails from cars at night. Just remember, with slow speeds, you absolutely need to keep the phone steady.
Play with these two settings together. Start by setting your ISO as low as possible. Then adjust the shutter speed until the picture looks correctly exposed on the screen. It’s like tuning a carburetor. A little fiddling and you’ll feel the power.
Shoot First, Edit Later (But Don’t Go Crazy)
Always shoot in the highest quality your phone allows. Then, use the editing tools right in your phone’s photo gallery. You don’t need a fancy app to start.
The big four edits are your best friends. A little bump in Exposure to brighten things up. A slight nudge of Contrast to make things pop. A tweak of Shadows to bring out details in the dark areas. And a careful slide of Saturation to make colors richer without making your steak look radioactive. Less is more. You’re aiming for “better,” not “obviously edited.”
The Final Shot
That’s it. No advanced degrees required. You’ve got the tools. A clean lens, an understanding of light, a few composition tricks, and the courage to try Manual Mode. It’s not about having the best phone. It’s about being a better photographer with the phone you’ve already got.
So go out there and use it. Capture the smoke rising off your grill, the perfect pour of a beer, your buddy’s face when he sinks a putt. Stop just taking pictures and start making photos you’re actually proud to show off. Now if you’ll excuse me, the light is just about perfect.